rakuyomi
rakuyomi is a manga reader plugin for KOReader.
"Ubunchu!" by Hiroshi Seo is licensed under CC BY-NC 3.0.
Installation
Installing rakuyomi on your e-reader is a straightforward process that consists of two main steps:
-
Choosing the Right Build: First, you'll need to download the correct version of rakuyomi for your specific e-reader model and firmware version. Different devices require different builds to ensure compatibility.
-
Installing to Your Device: Once you have the correct build, you'll set up a basic configuration file and copy the necessary files to your e-reader. The process is similar across different devices, with only minor variations in folder locations.
Follow the chapters in this section to get rakuyomi up and running on your device. If you run into any issues, our community is here to help through the issue tracker.
Choosing a Build
In order to install rakuyomi, you'll first need to choose the correct build for your e-reader device. Read the section according to your device, and then download the appropriate build of the latest release. With the correct build in hand, proceed to install it to your device.
If your device is unsupported or does not work with the given builds, feel free to open an issue on the issue tracker!
Kindle
For Kindle devices, check the table below for determining the correct build:
| Model | Firmware Version | Build to Use |
|---|---|---|
| 3rd generation or older (devices with physical keyboards) |
any | unsupported |
| Kindle 4 or newer (devices without a physical keyboard) |
≥ 5.16.3 | Kindle (hard floats) |
| < 5.16.3 | Kindle |
reMarkable
Users of the reMarkable Paper Pro should use the AArch64 build. Other reMarkable devices should work with the Kindle build.
Kobo, PocketBook and other ARM e-readers
Use the Kindle build.
BOOX and other Android-based e-readers
Android e-readers are currently unsupported. Leave a thumbs up on this issue if you'd like for it to be supported!
Installing to Your Device
After downloading the plugin, follow these instructions to install it on your device.
Writing Your settings.json
The settings.json file contains basic settings that rakuyomi needs to work, including:
- Source lists: URLs containing information about available sources
- Languages: Your preferred reading languages
Here's a recommended starter configuration that you can customize or use as-is:
{
  "$schema": "https://github.com/hanatsumi/rakuyomi/releases/download/main/settings.schema.json",
  "source_lists": [
    "https://raw.githubusercontent.com/Skittyblock/aidoku-community-sources/refs/heads/gh-pages/index.min.json"
  ],
  "languages": ["en"]
}
Copying the Plugin to Your Device
-
Extract the
.zipfile containing the plugin. You should find arakuyomi.kopluginfolder inside. -
Connect your e-reader to your computer.
-
Navigate to your KOReader installation folder. Common locations include:
- Cervantes:
/mnt/private/koreader - Kindle:
koreader/ - Kobo:
.adds/koreader/ - PocketBook:
applications/koreader/
- Cervantes:
-
Locate the
pluginsfolder:
-
Copy the entire
rakuyomi.kopluginfolder into thepluginsfolder: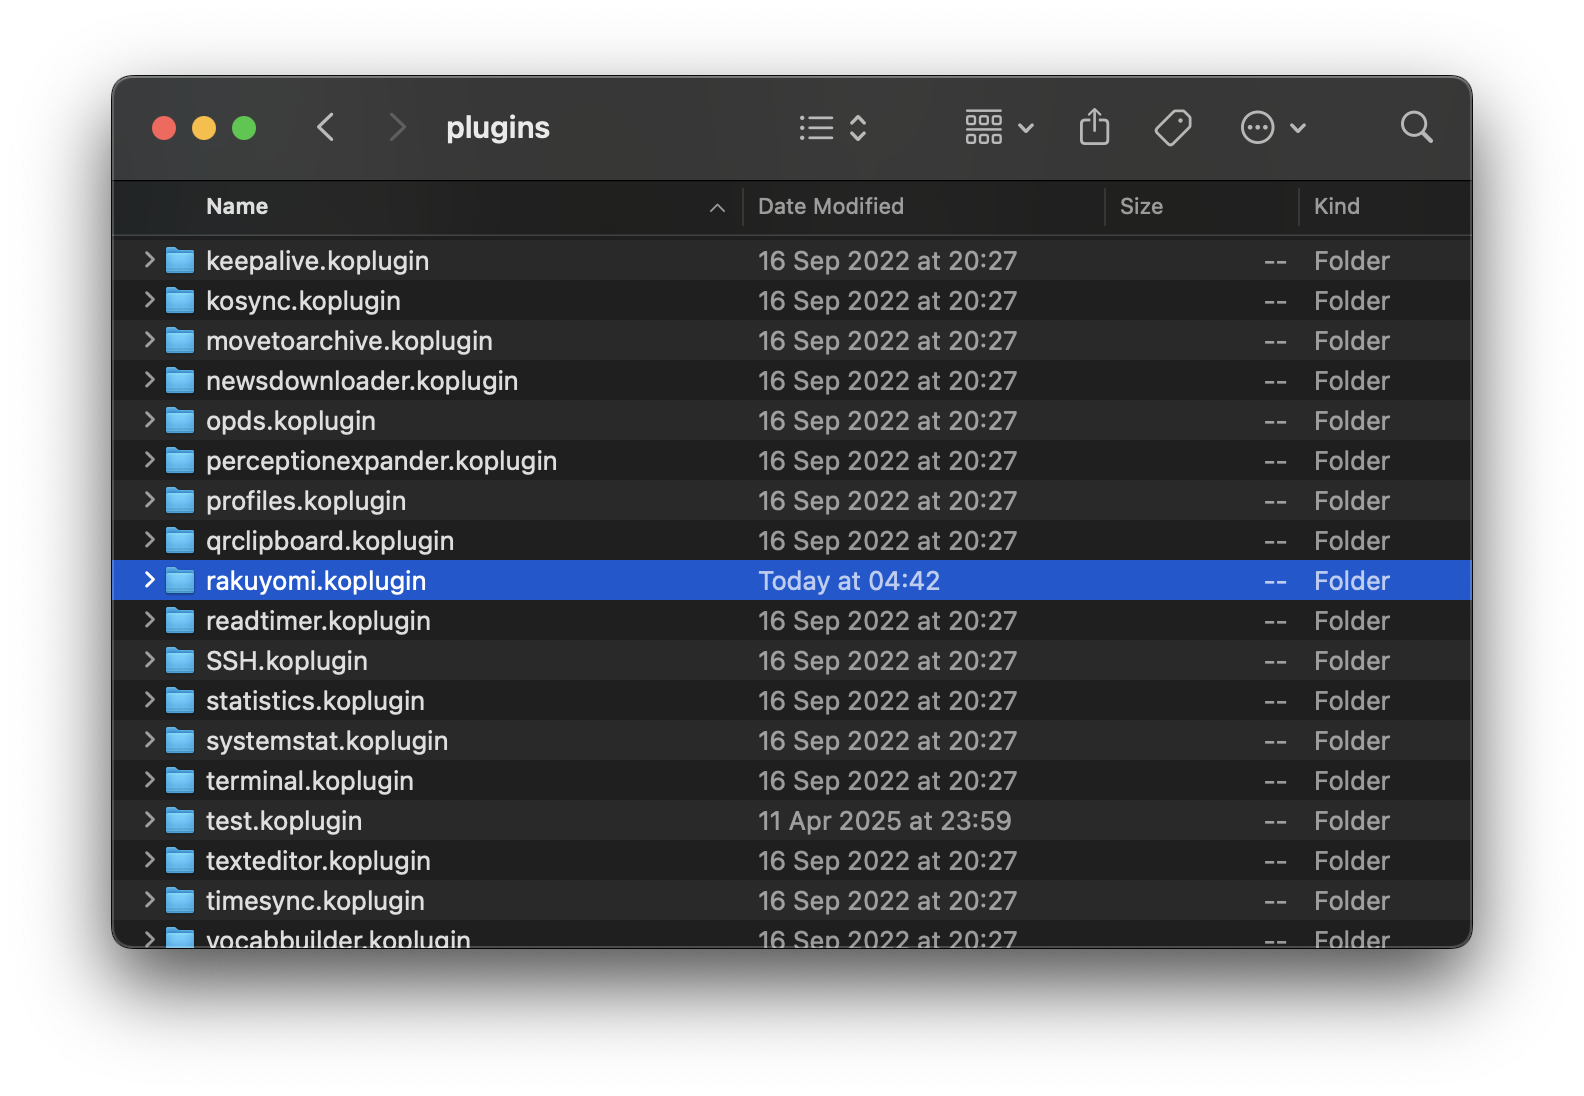
-
Return to the KOReader folder and create a new
rakuyomifolder: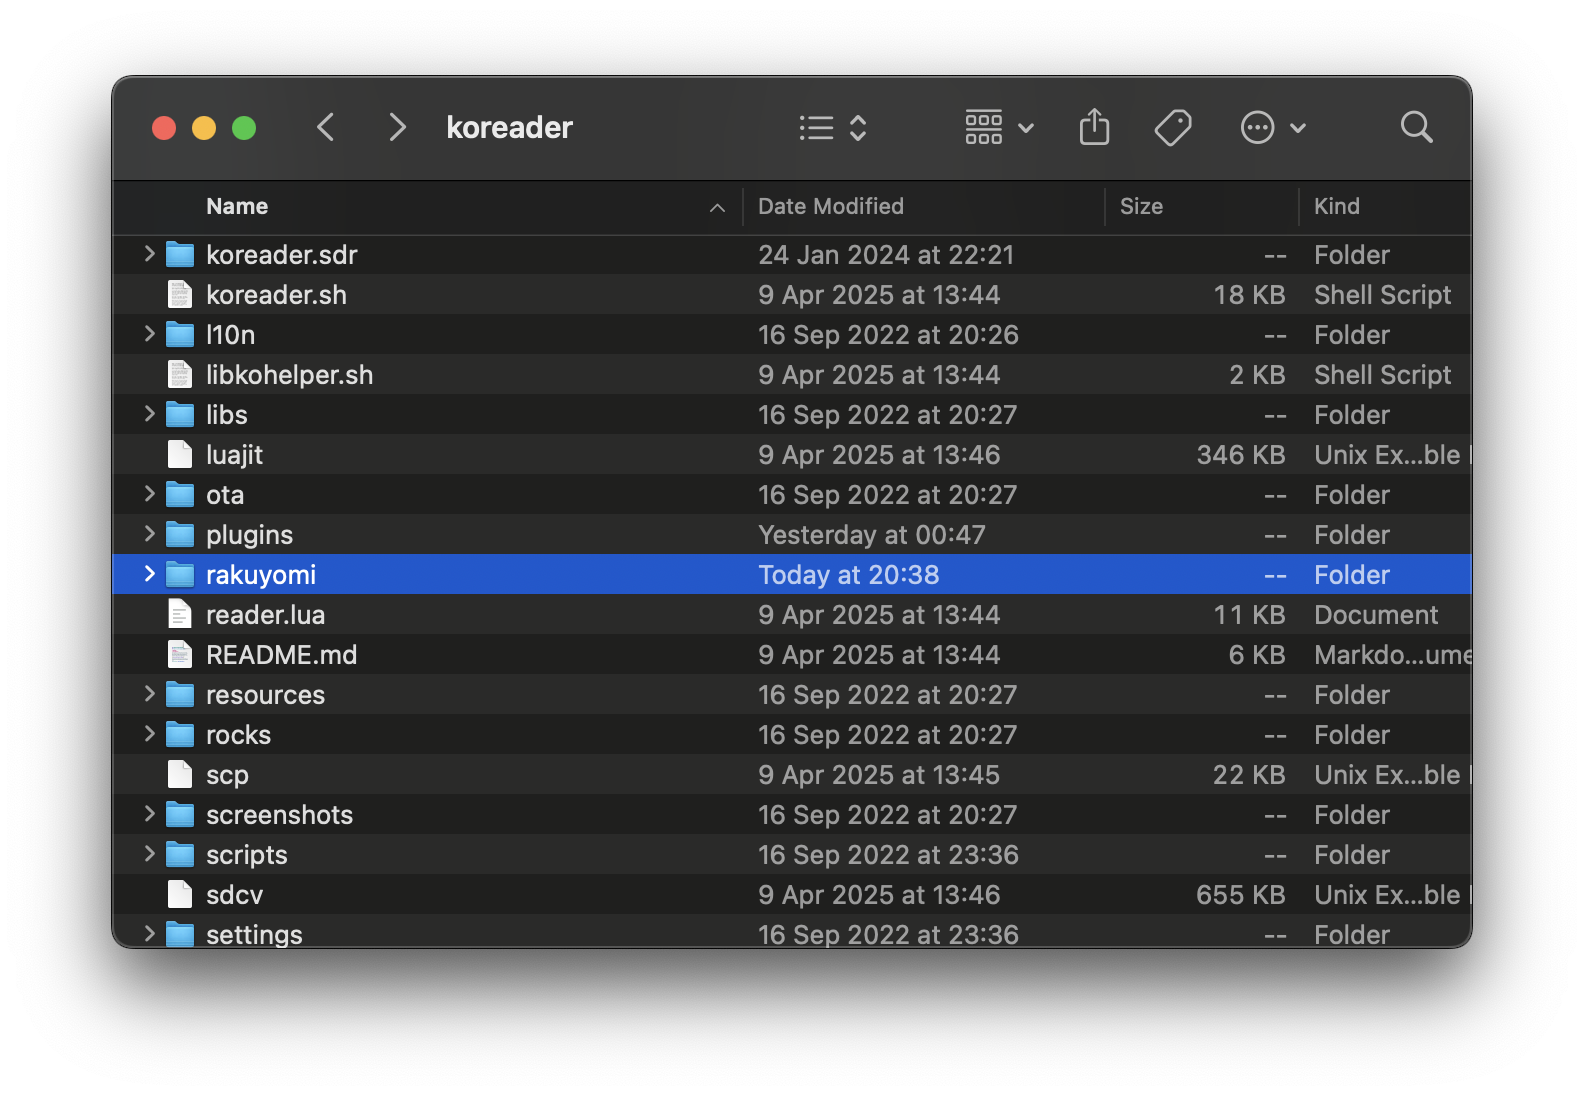
-
Copy your
settings.jsonfile into the newrakuyomifolder: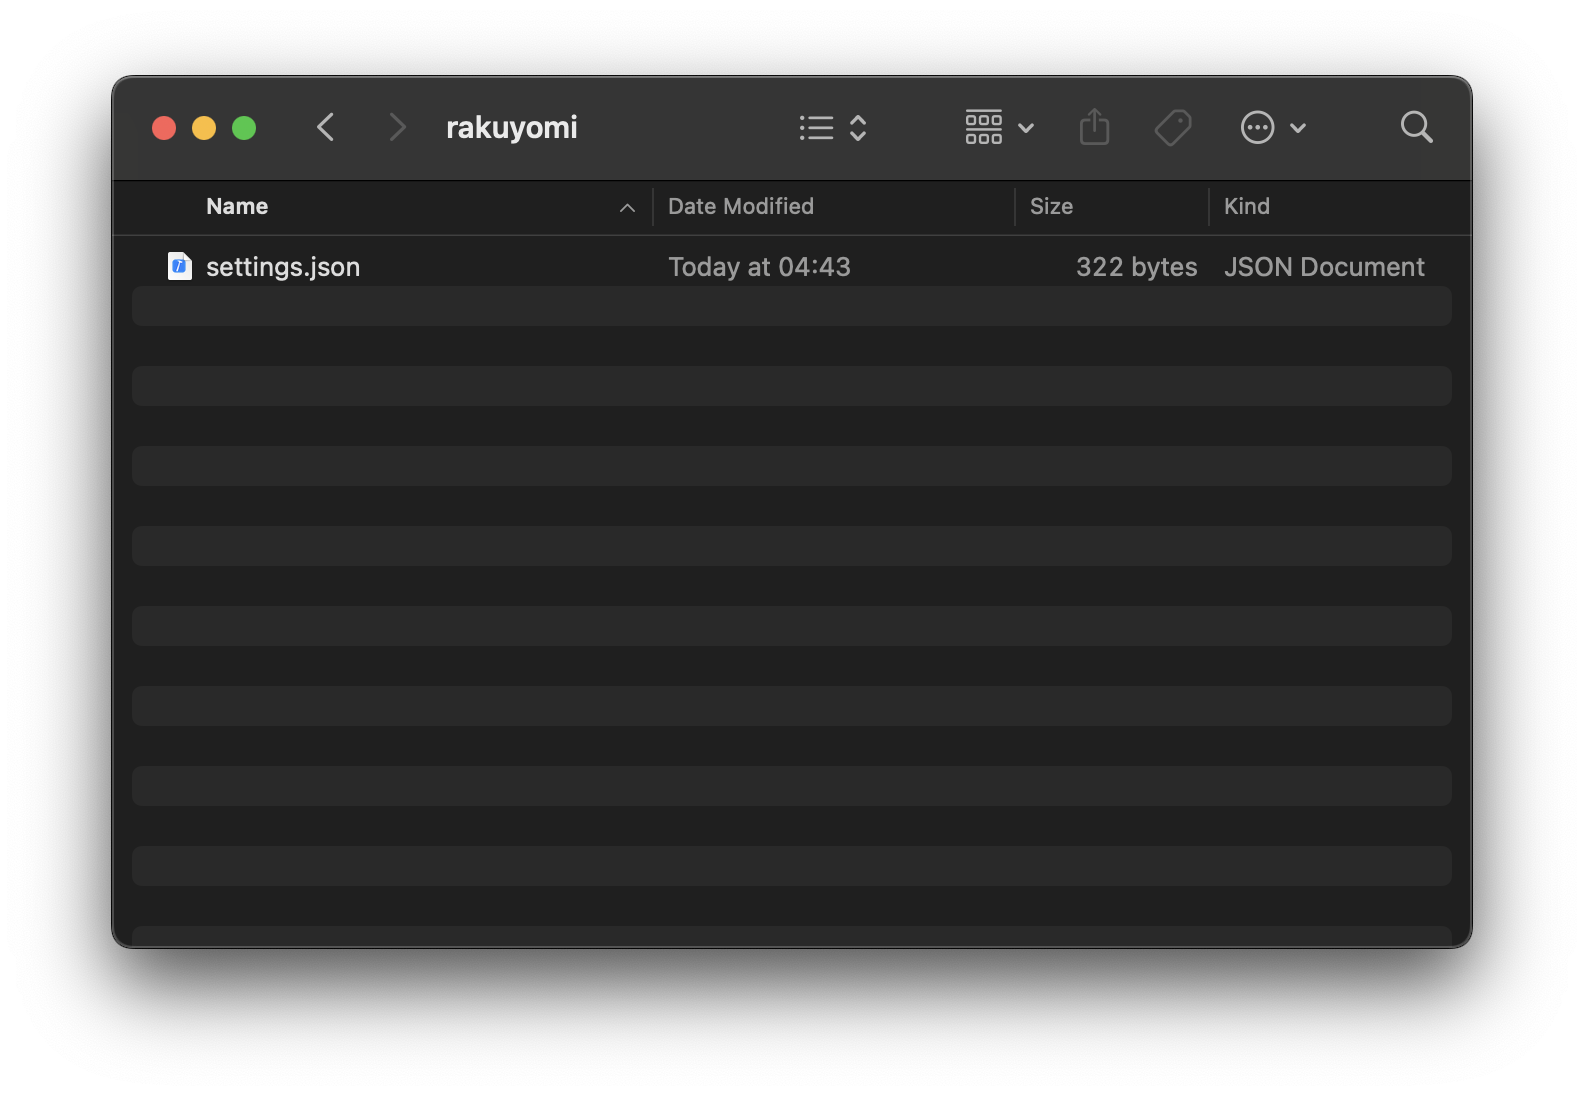
rakuyomi is now installed on your device! Ready to get started? Check out the Quickstart Guide to learn how to use it effectively.
Quickstart
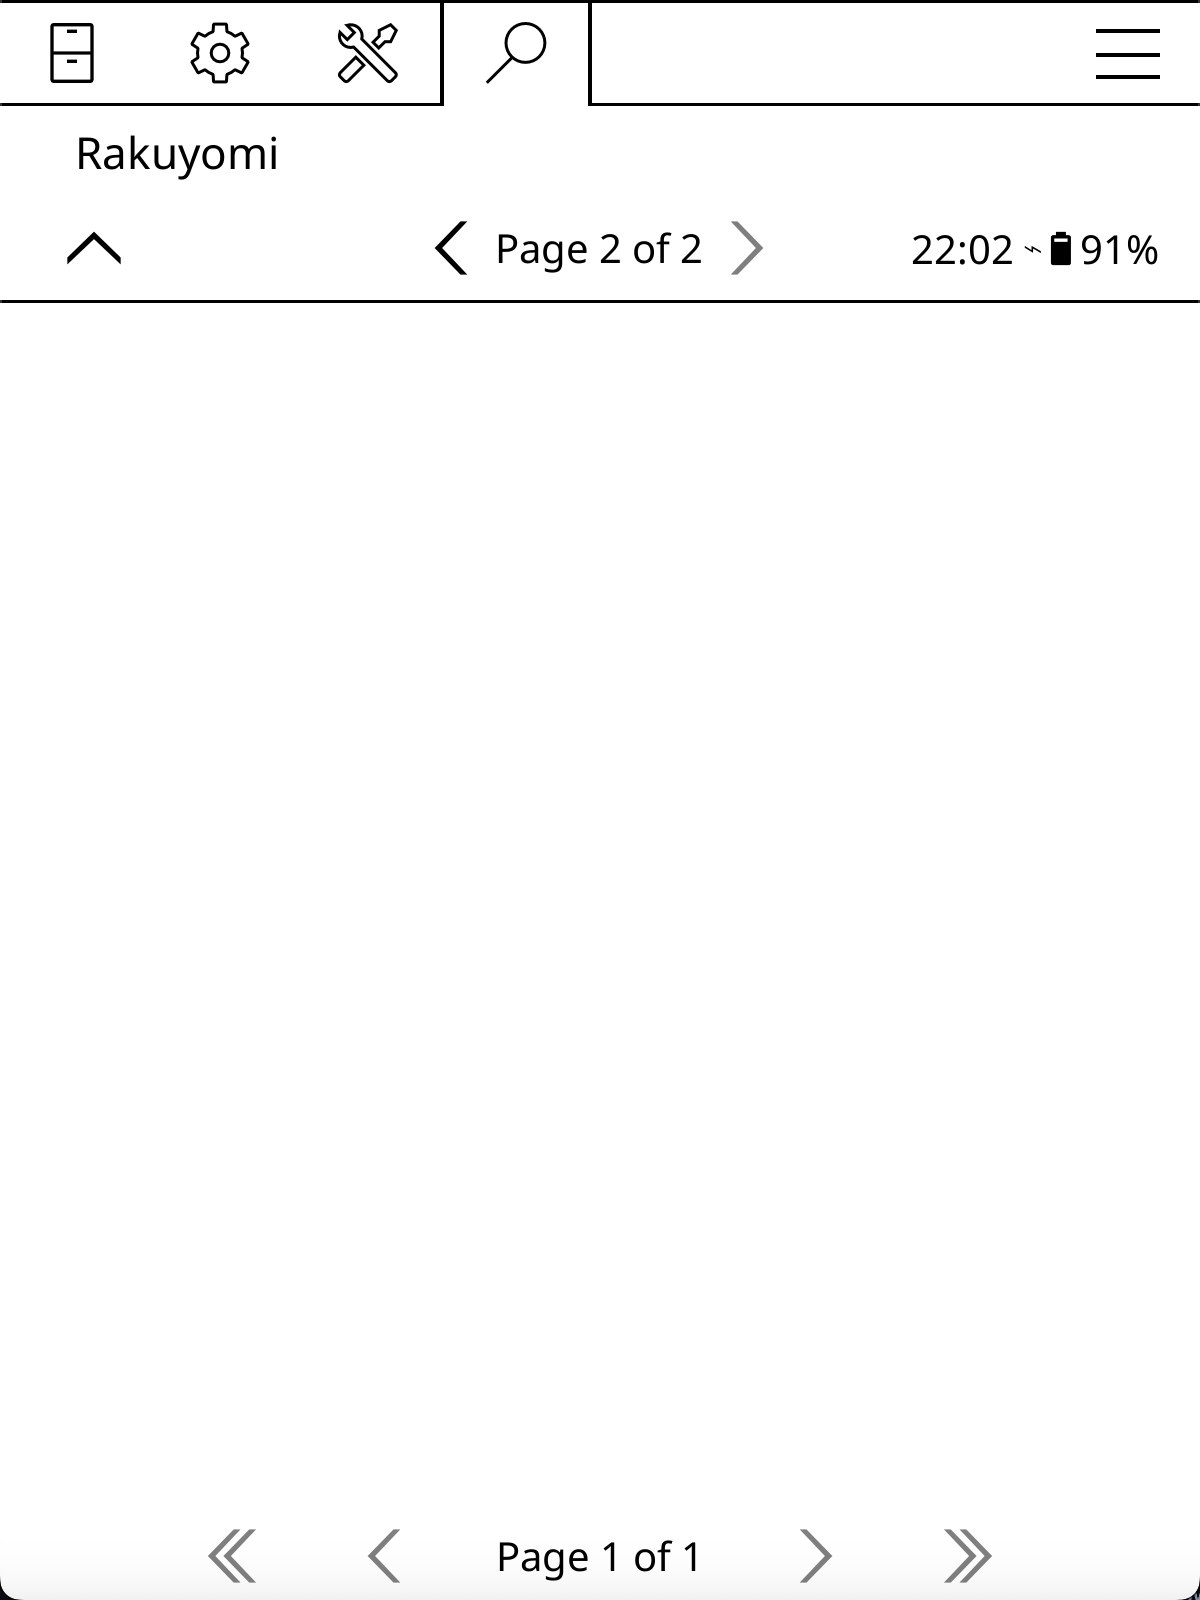
Here's a quick guide to rakuyomi's core functionality. After installing, tap on the top section of the screen while in the File Manager to bring up the menu bar. Go to the menu and select Rakuyomi:
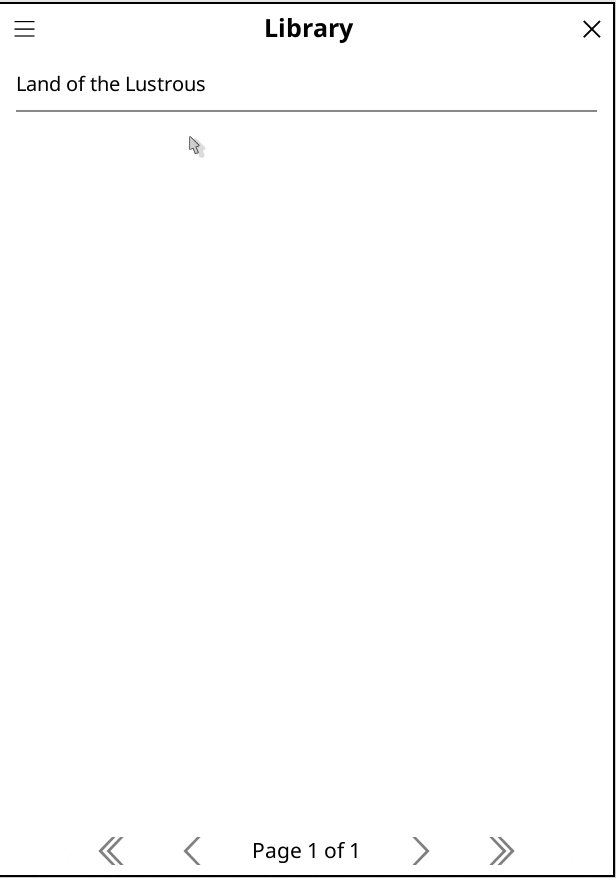
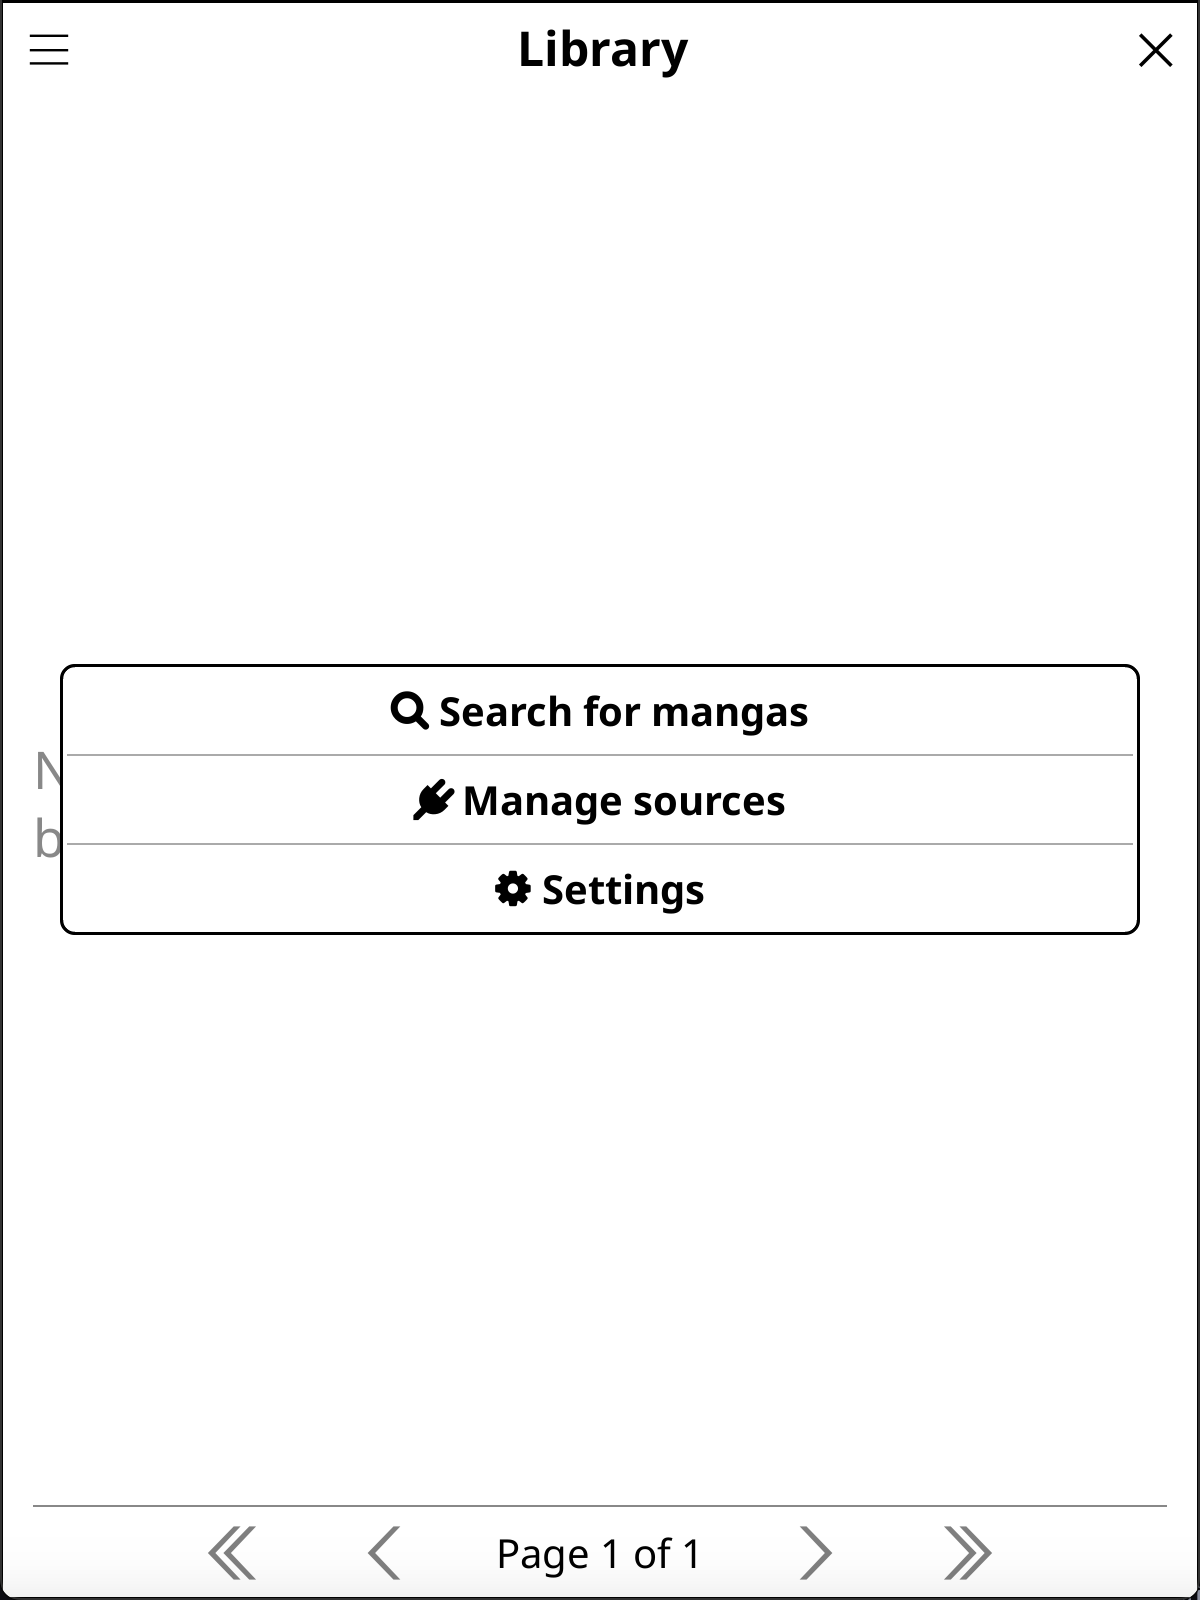
You'll see rakuyomi's Library, which should be empty at first. Let's install some sources to get started. Tap the button on the top-left to bring up the menu, and select Manage Sources:
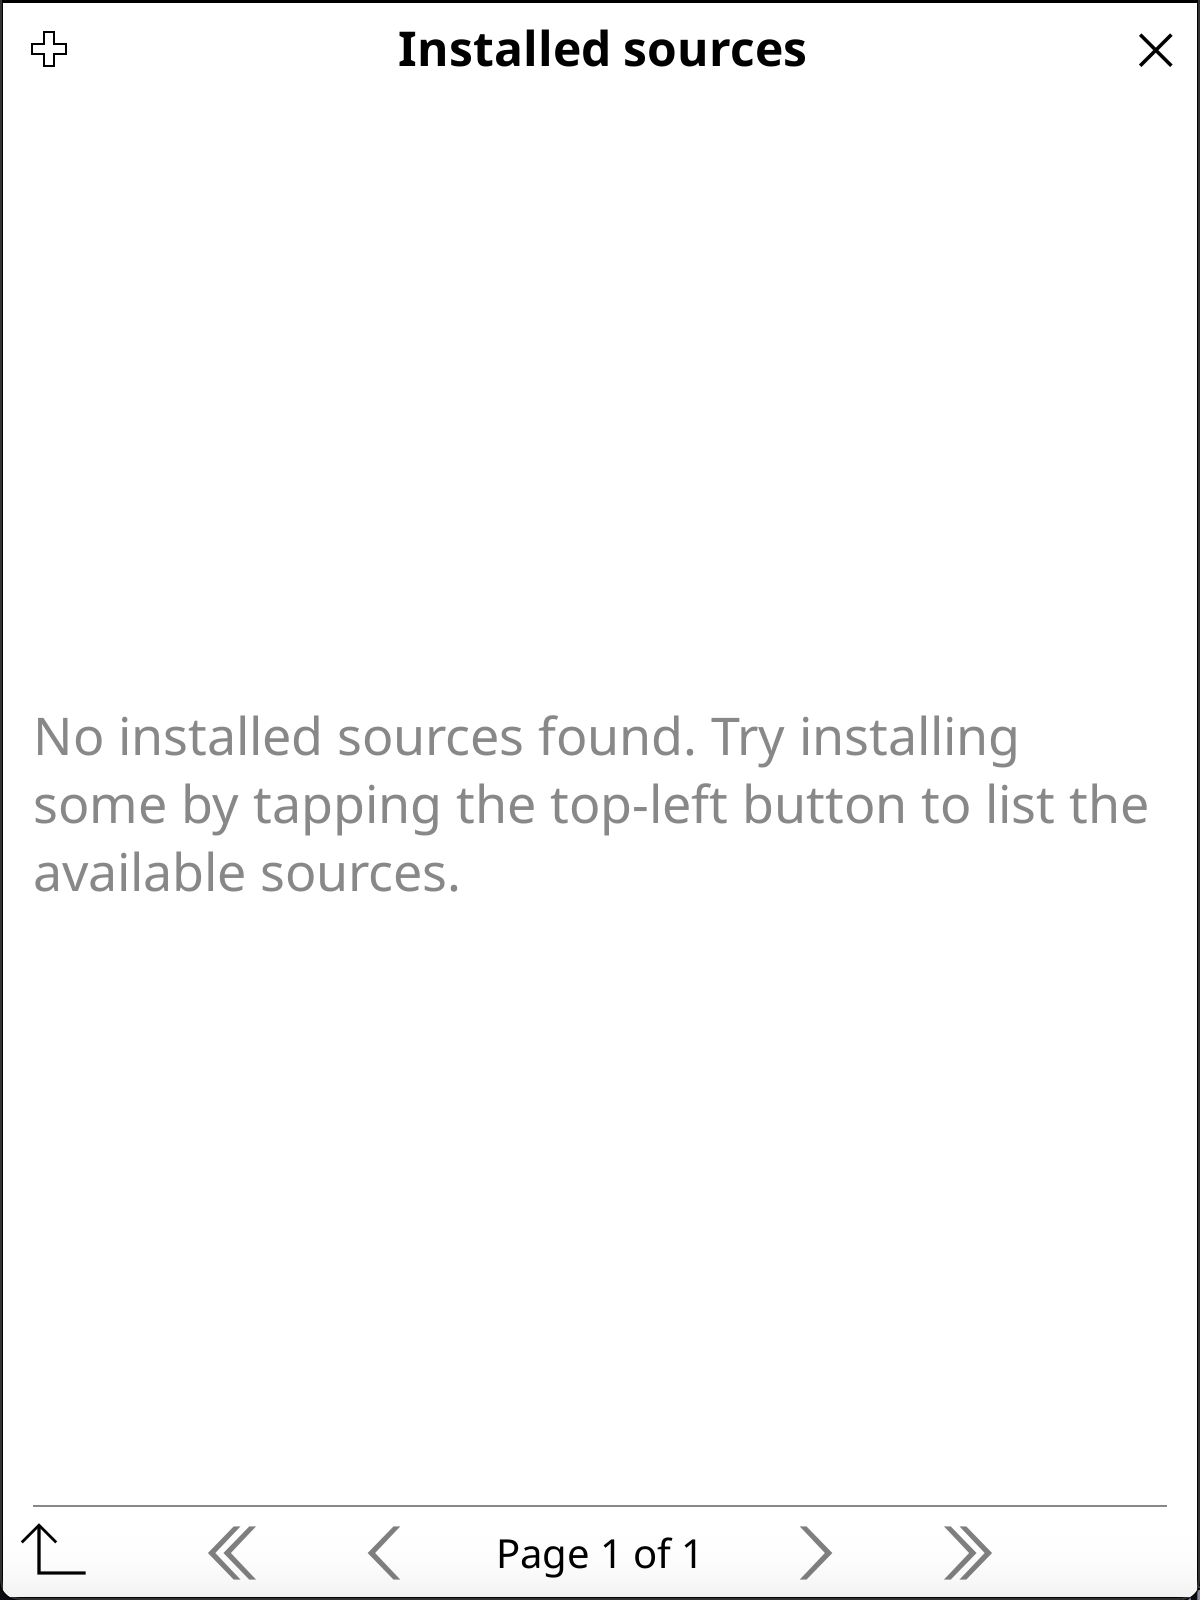
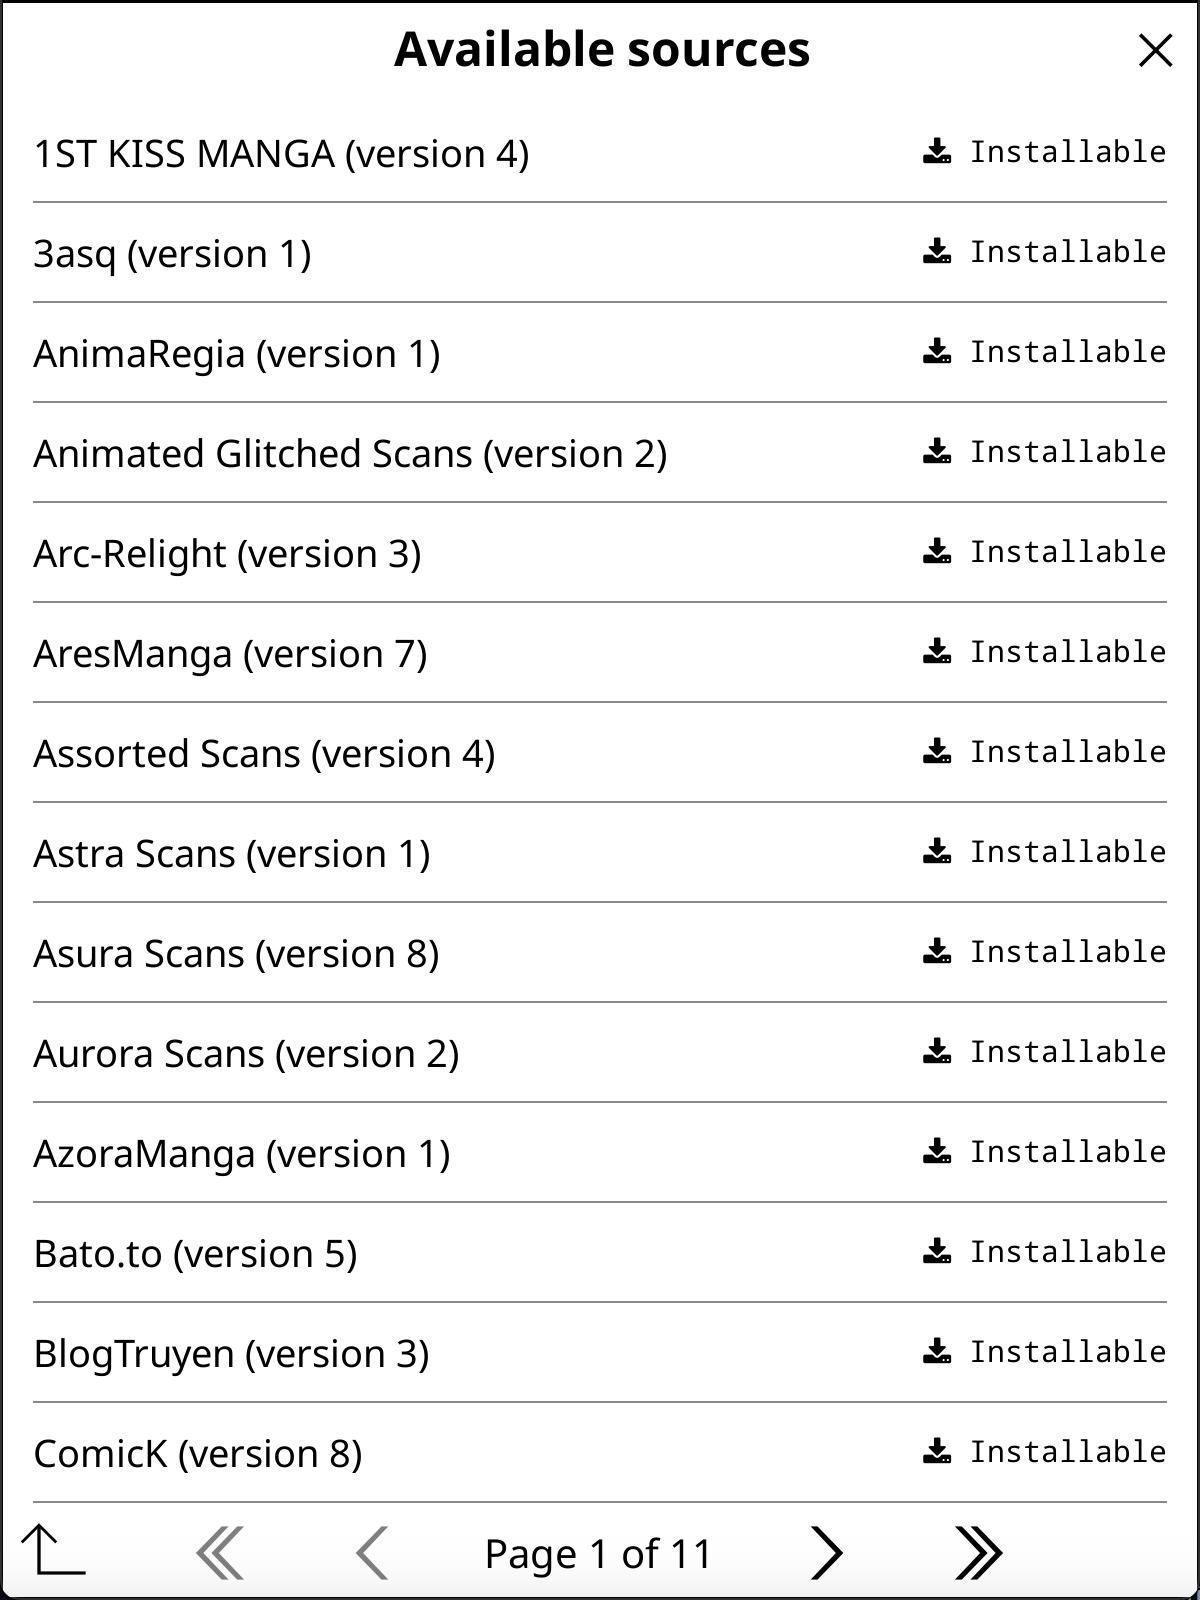
You'll now see a list of Installed Sources (which will be empty initially). Tap the button in the top-left to install new sources. Simply tap on any source in the list to install it!
Return to the Library by tapping the back button in the bottom left. To search for mangas, open the menu () and select Search mangas:
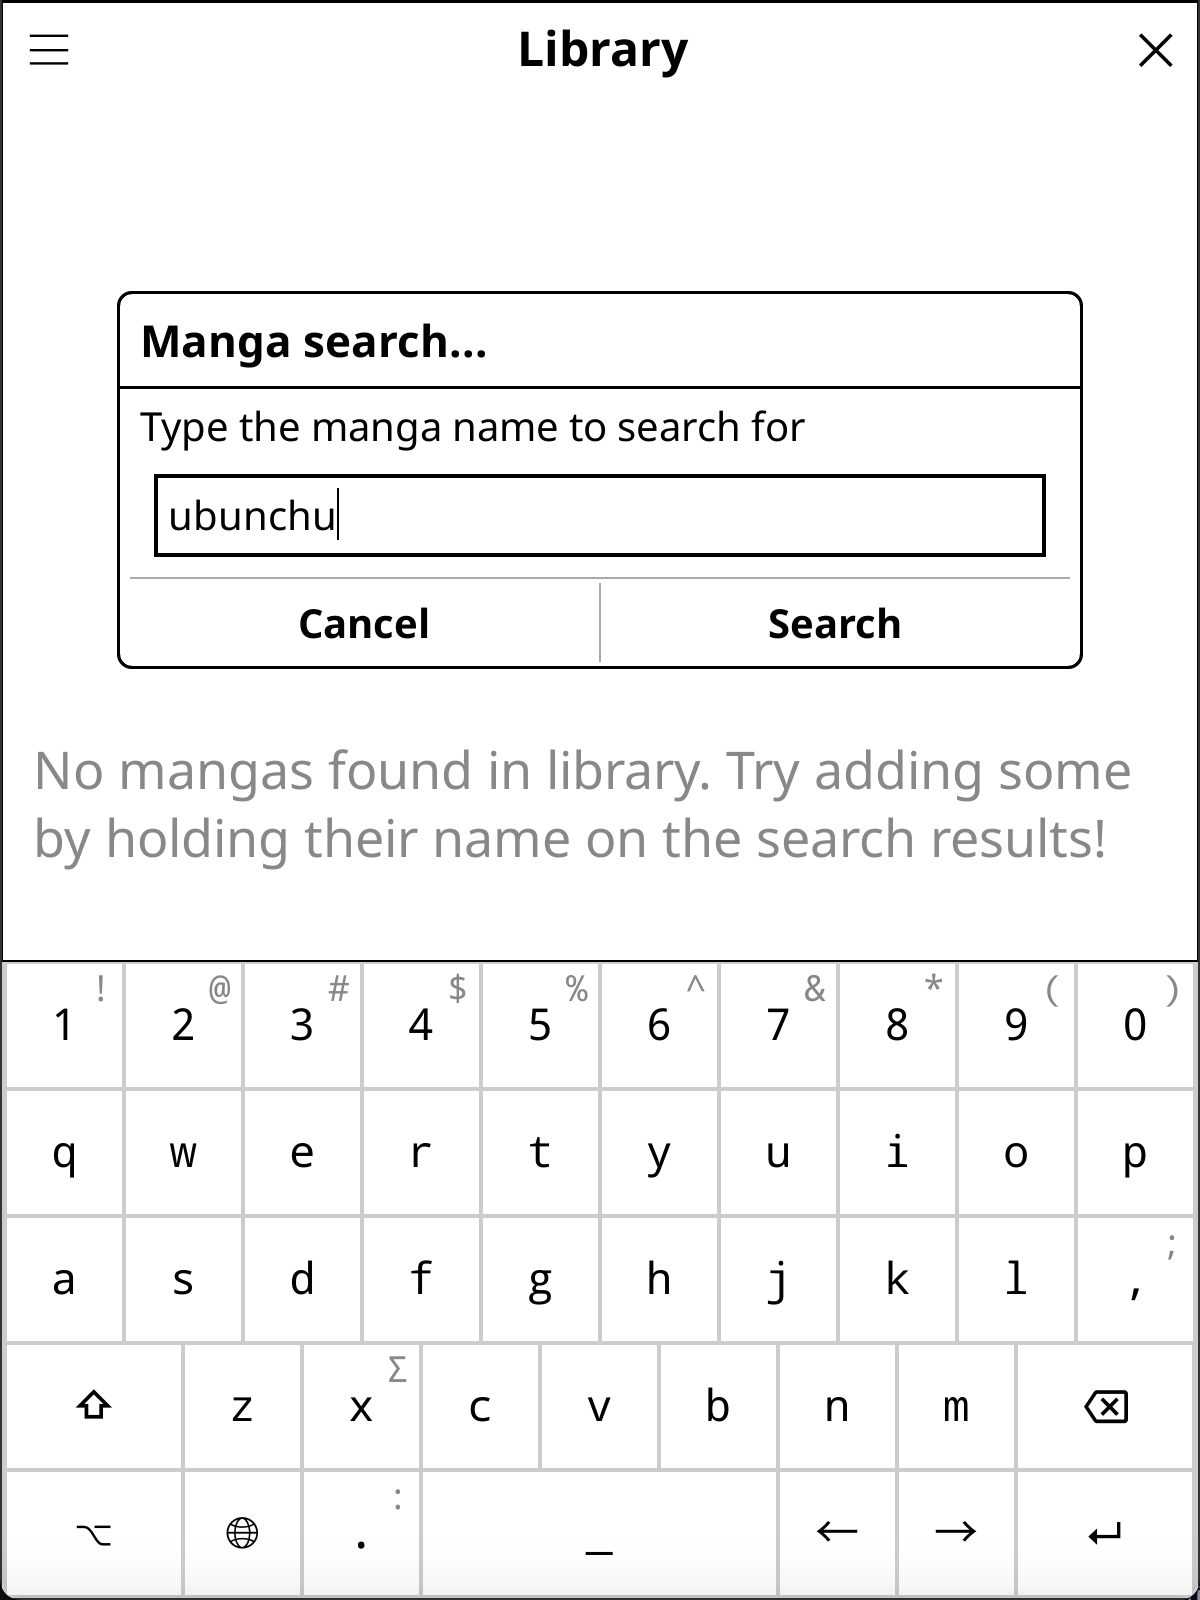
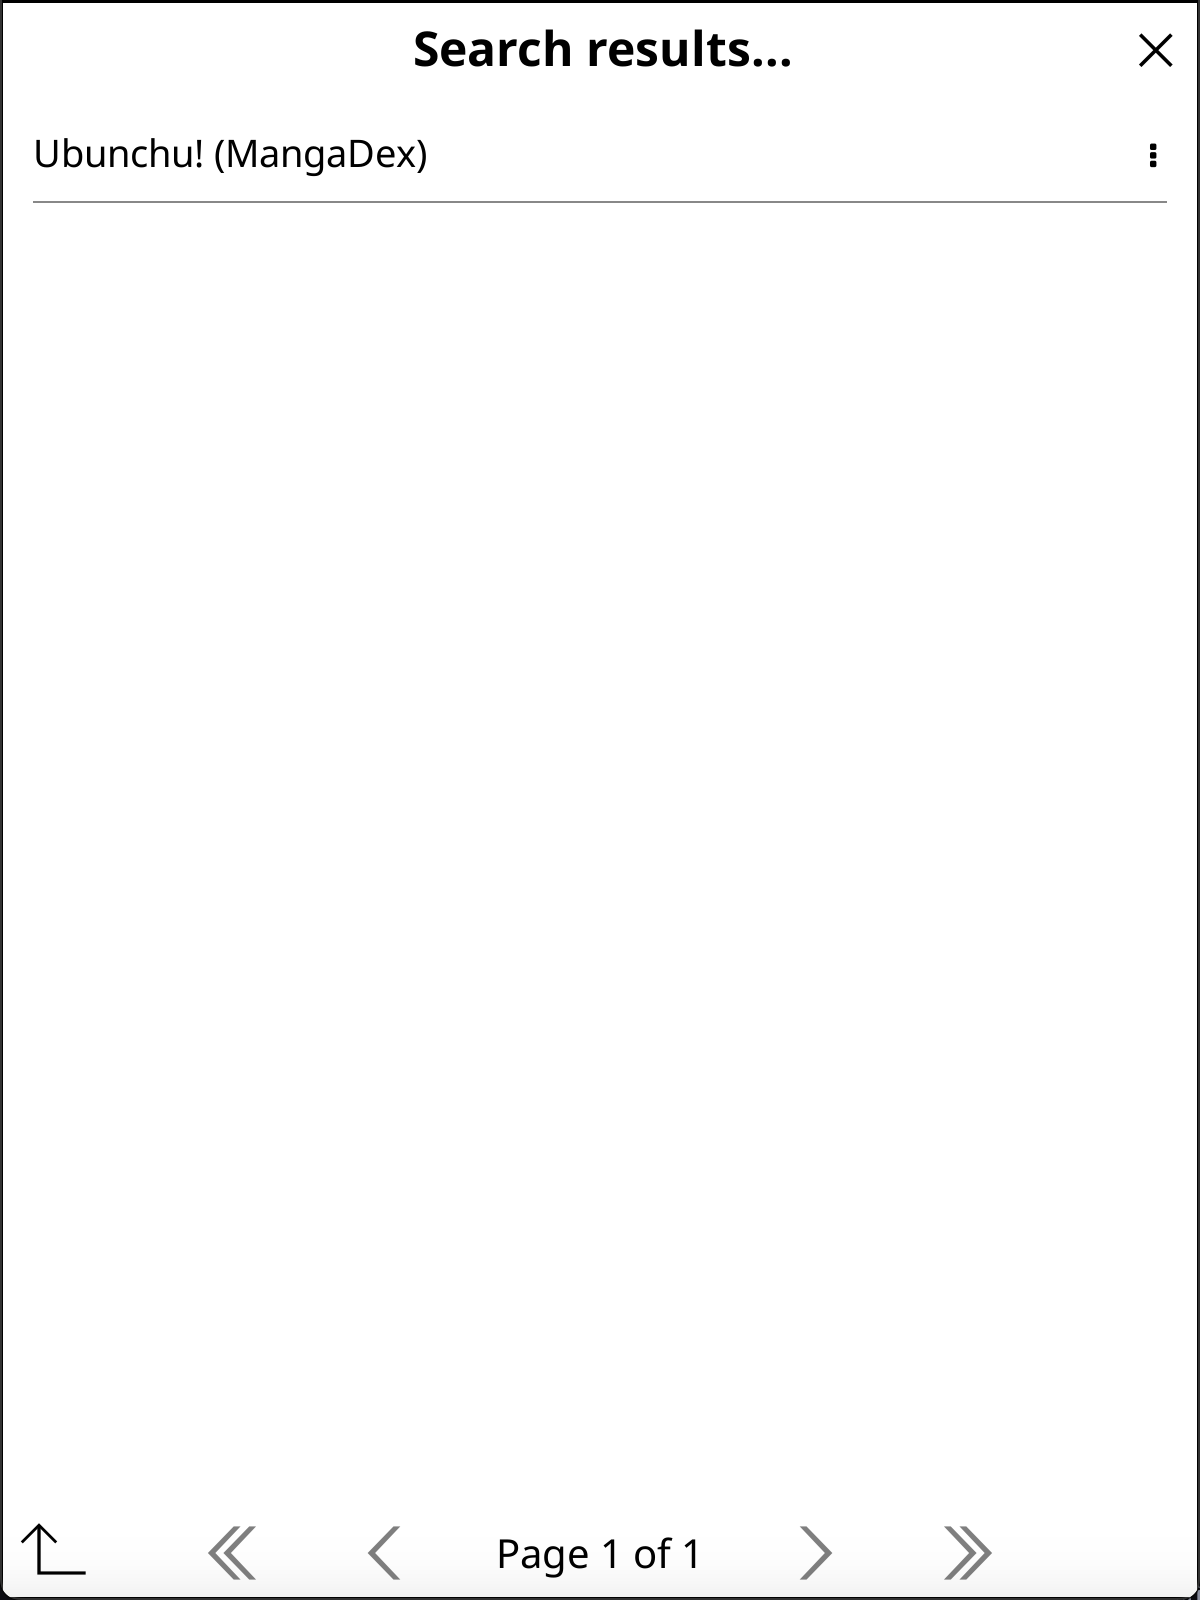
After entering your search terms, you'll see a list of search results. Tap on a manga's title to view its available chapters, then tap on a specific chapter to begin reading.
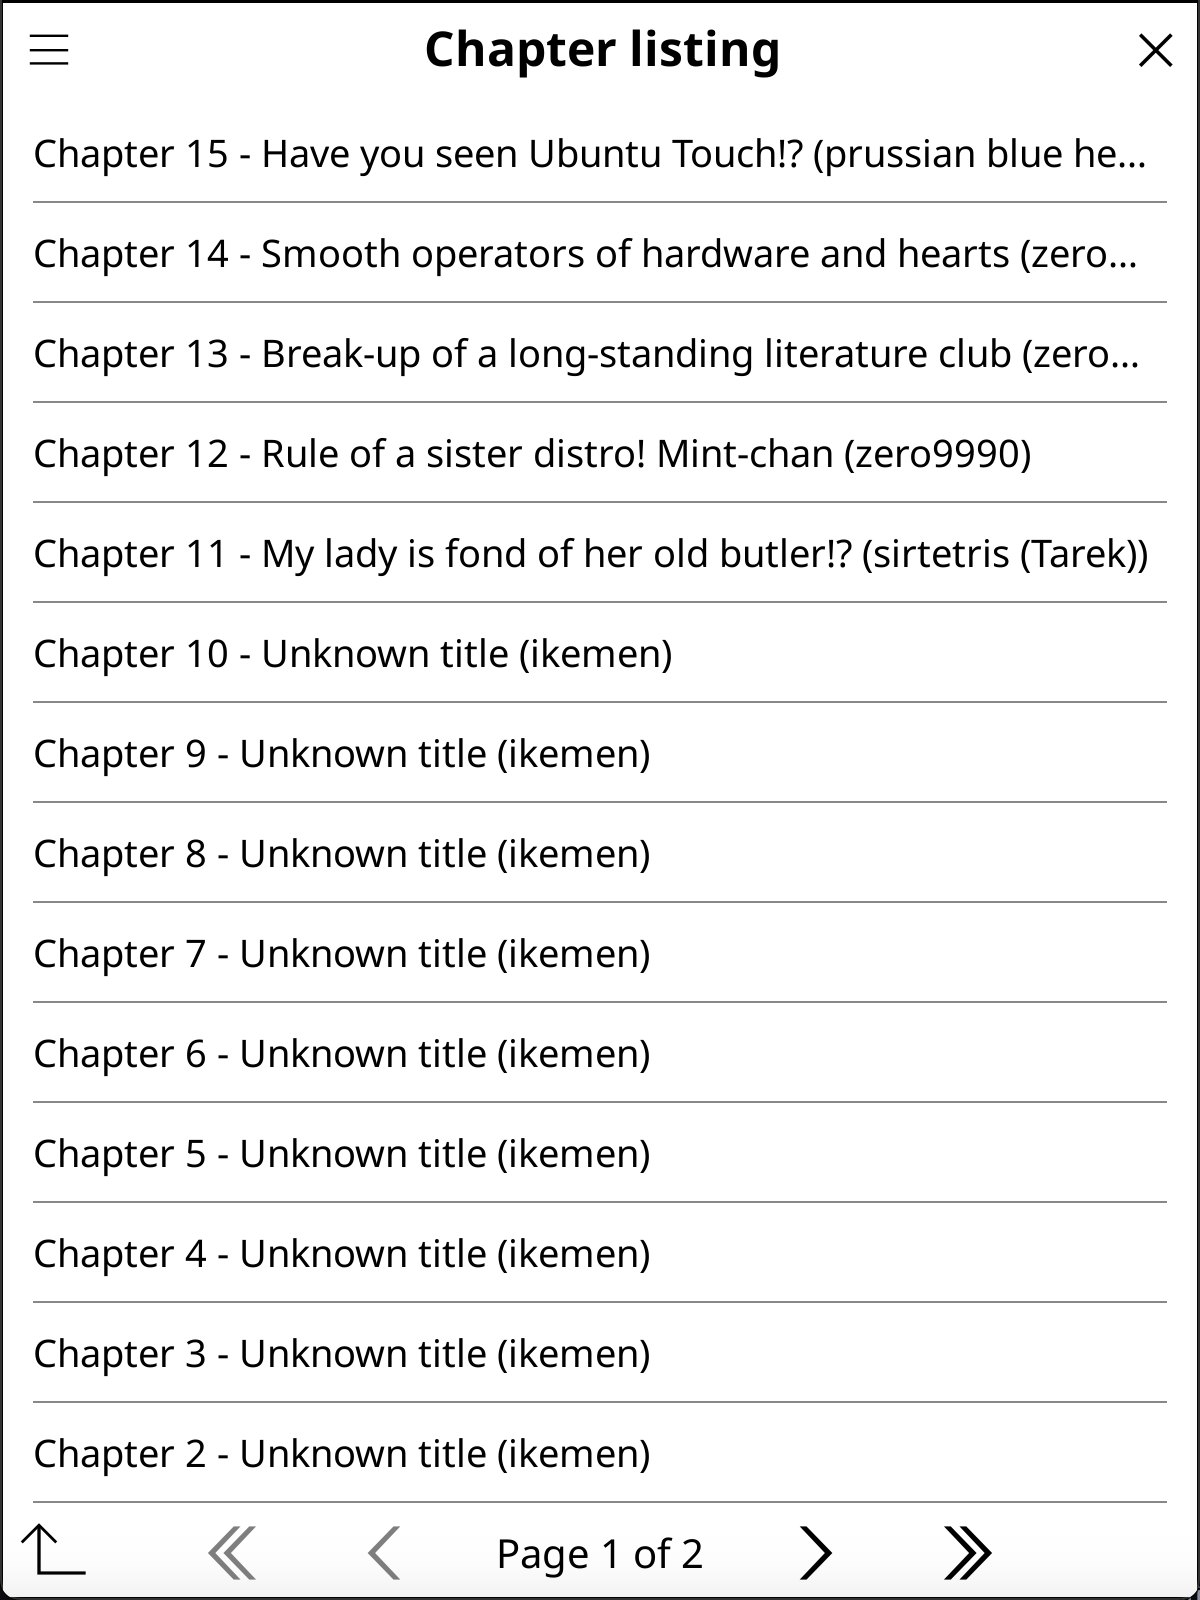
Whenever you see an item with a icon to the right, tapping next to it or holding on the item will open a dialog with additional options.
For example, tap-and-holding on a manga in the search results will prompt you to add it to your Library for easier access later.
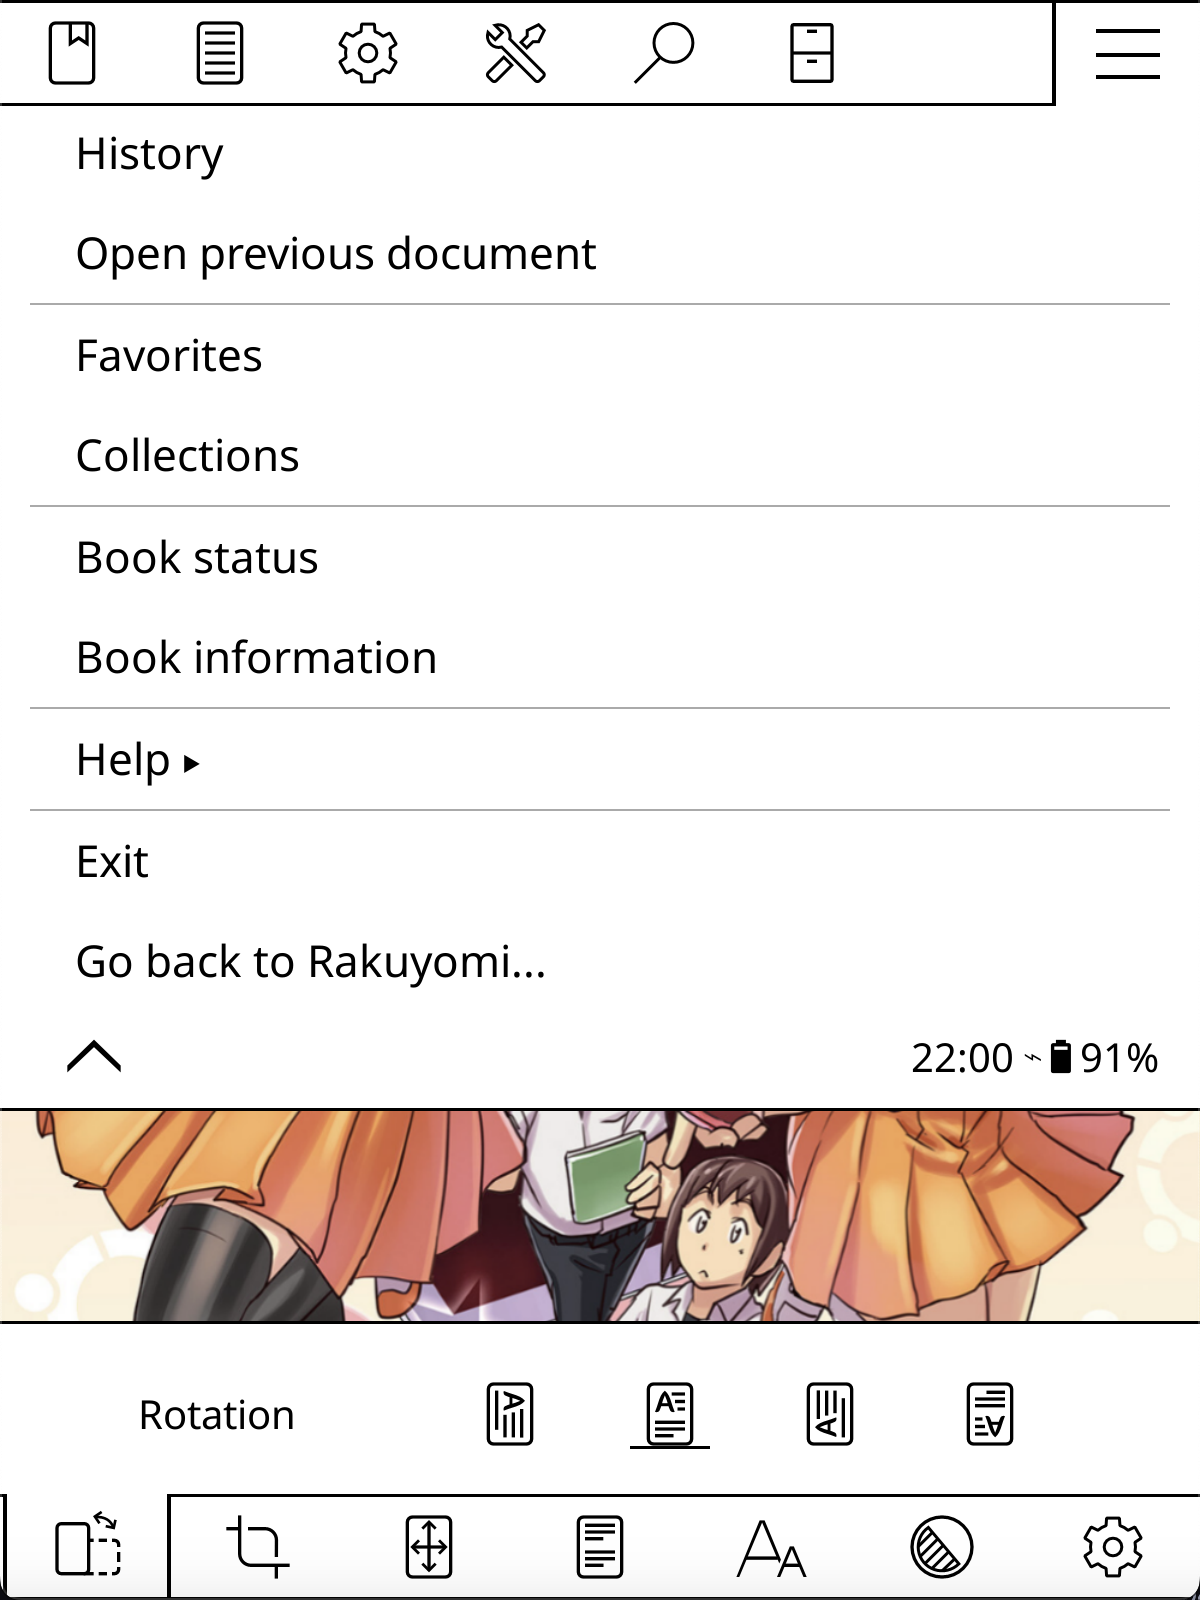
rakuyomi will open the selected chapter in KOReader's reader. To return to rakuyomi at any time, tap on the top section of the screen to bring up the menu bar, go to the menu, and select Go back to Rakuyomi.

After reaching the last page of a chapter, rakuyomi will automatically download and open the next chapter when you attempt to navigate forward. This seamless transition allows you to continue reading without interruption!
Congratulations! You're now ready to enjoy manga using rakuyomi. For an enhanced reading experience specifically tailored for manga, check out the reader's recommended settings to optimize page navigation, image scaling, and other important display options.
Reader Recommended Settings
While not required, you can change some settings on KOReader's reader for a better manga reading experience.
For all of the following settings, tap-and-holding on them will make it the default for the current file type (we store the downloaded chapters in .cbz files, so any settings applied to .cbz files will also work on chapters read through rakuyomi).
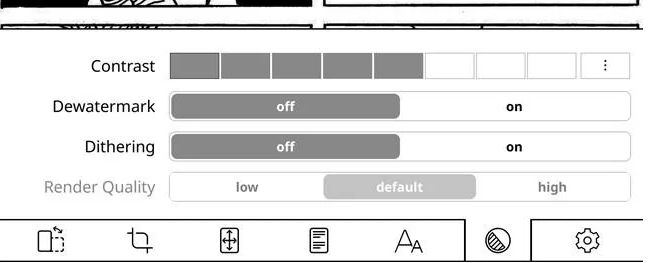
Enable dithering
In the bottom menu, go to the next-to-last submenu, and then set Dithering to "on". This might also fix washed out colors on e-ink devices that support them.
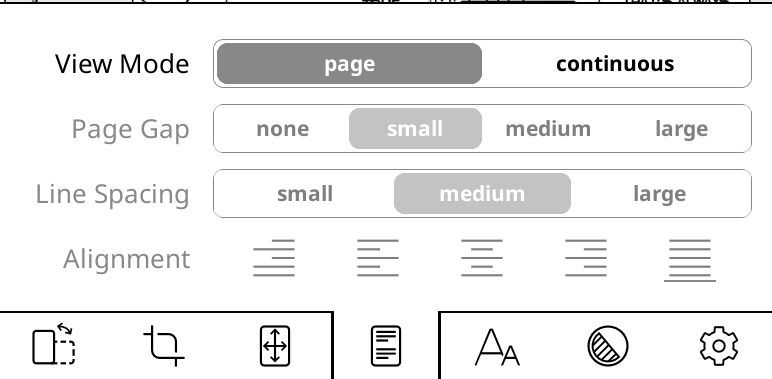
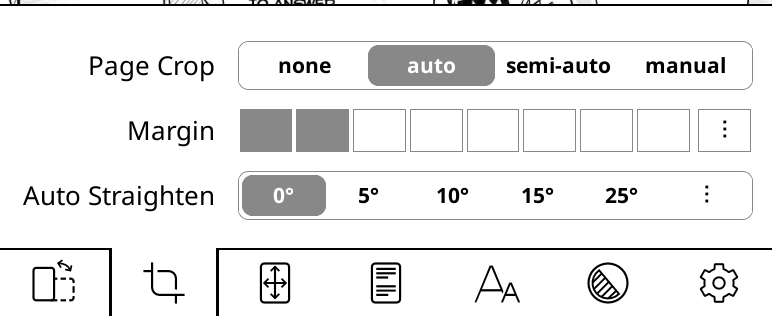
Use the "page" view mode and enable automatic page cropping
Also in the bottom menu, go to the fourth submenu and set the View Mode to "page"; then go to the second submenu and set Page Crop to "auto".
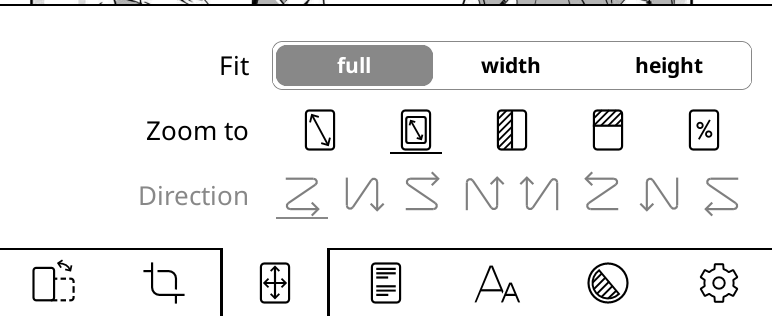
Fit the entire page on the screen
Go to the third submenu on the bottom menu, then set Fit to "full". This will resize the pages so that they fit completely inside your screen.
Offline Mode
rakuyomi is designed to work both online and offline, allowing you to read manga even when you don't have an internet connection. This guide explains how offline mode works and how to make the most of it.
How Offline Mode Works
When you don't have an internet connection, rakuyomi automatically enters offline mode. You'll know you're in offline mode when you see this indicator at the top of the screen.
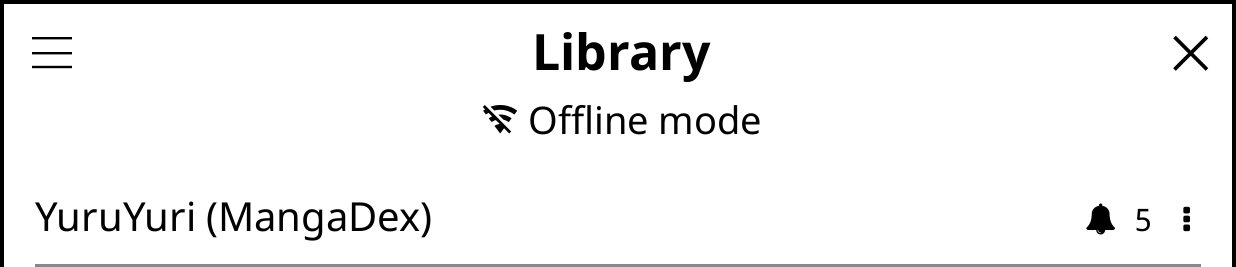
In offline mode:
- You can read any previously downloaded chapters
- Your library content will remain accessible
- Features requiring internet connectivity will be limited
Preparing for Offline Use
To make the best use of offline mode, you should download chapters when you have an internet connection. The quickest way to prepare for offline reading is by using the download unread chapters tool:
Downloading Unread Chapters
To download multiple unread chapters at once:
- Open a manga from your library
- Tap the menu button () at the top-left
- Select "Download unread chapters..."
- Enter the number of unread chapters to download, or leave blank to download all unread chapters
- Tap "Download"
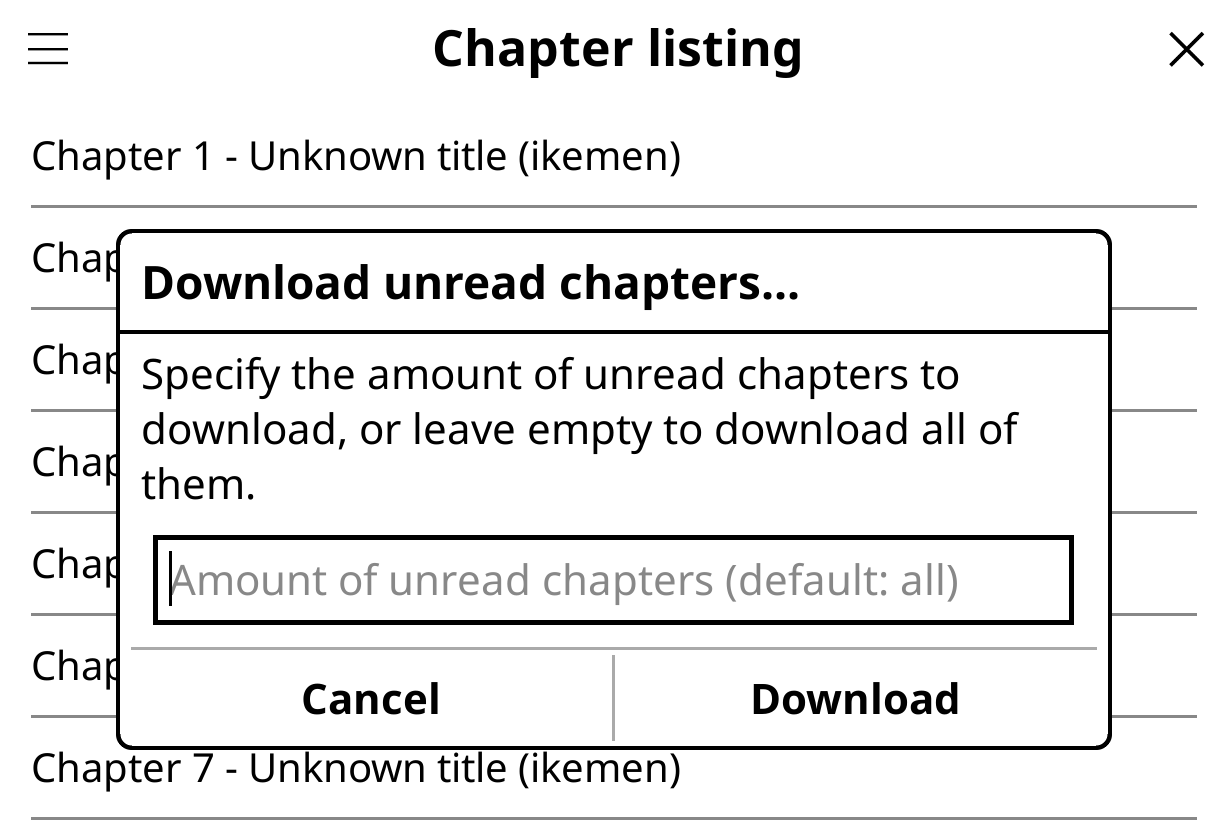
A progress dialog will show the download status. You can cancel the download at any time.
Storage Management
rakuyomi stores downloaded chapters as .cbz files in the downloads folder within the rakuyomi directory. When the storage limit is reached, older downloaded chapters will be automatically removed to make space for new downloads.
You can configure the storage size limit by opening the menu in Library, then going to Settings. The default storage limit is 2GB.
Setting up the Environment
This section will guide you through setting up the required environment to develop rakuyomi.
Prerequisites
Before proceeding, you'll need the following tools installed:
- Linux, macOS or Windows (under WSL)
- A working Git installation
- devenv, used to centralize development dependencies
- direnv, used to automatically enter the development environment generated by
devenv - Visual Studio Code
Running KOReader under WSL requires WSLg to be configured.
Cloning and Setting Up Your IDE
First, clone the repository, copy the .envrc.dist to .envrc and allow it to be loaded:
$ git clone https://github.com/hanatsumi/rakuyomi.git
$ cd rakuyomi
$ cp .envrc.dist .envrc
$ direnv allow
If you've enabled direnv's shell integration, you should automatically enter a developer shell: a shell containing all development dependencies and useful scripts!
Don't worry if you haven't though, you can always enter it by yourself by running devenv shell.
After that, open the repository in VSCode. You'll be prompted to install the recommended extensions – installing them is highly recommended, as it'll make developing rakuyomi much easier.
After installing the recommended extensions, another prompt will show up - asking whether you want to reload the environment. Accept it, and then you're ready to work with rakuyomi! Here are some useful commands available in the development environment:
dev: starts KOReader with the rakuyomi plugin built from source. Run this in your terminal when you want to test your changes.debug: starts KOReader with the rakuyomi plugin, and attaches a Rust debugger to theserverprocess. Use this when you need to debug issues in the server component.